fredag den 26. december 2014

Fancy Friday #85: Favourite Design of 2014

I hope you all had a fantastic Christmas and got most of what you wanted ;) - any nail related gifts beneath your tree this year?

This will be the last Fancy Friday post before the year is ending - this is the last in 2014 - the next will be on January 2nd 2015 :D.

So for this year's final FF post I am posting my favourite designs this year - and I have chosen 9 of my Fancy Friday manis that I liked the most. They all represent ideas that came out almost exactly like I envisioned them when I thought them up - which makes me super proud of them!!!


If you'd like to read more about the individual mani, here are the links:
Waterfall
Untried
Dry Brush
Famous
Around the World
Ice Cream
Texture
Negative Space
Black/White


I will see if I can find the time to post my other Fancy Friday Christmas Nails - but that is still up in the air - I am super busy the next four days.

If we don't see each other before: Have a wonderful New Year!!!

And remember to look at the other FF bloggers favourite designs.

Glædelig jul allesammen!!!!
Det her er det sidste Fælles Fredag indlæg i 2014 - næste gang er d. 2. januar 2015 :D. Emnet er yndlingsdesign i 2014, og jeg har valgt 9 af mine FF manier. En ting har de til fælles: Ideen jeg havde i hovedet er næsten 100 % det som ramte mine negle - og det gør mig vildt stolt  over de her designs!!!

Husk også lige at kigge med hos de andre skønne Fælles Fredag bloggere.

onsdag den 10. december 2014

Loki's Nail Vinyls

As some of you know I am a huge fan of tape manicures and that it has evolved into a I-love-using-nail-vinyls-instead-of-tape kinda thing.

So I was thrilled when Tara from Loki's Lacquer contacted me to do a review of her new addition to her line: Nail Vinyls. I received a small selection of vinyls and decals that are available in her shop - and I got something else extremely exciting in my envelope, but I'll return to that in a while.

For you to get a feel for what she can offer, here are the vinyls and decals I got:


I fell in love with the small triangles since I thought they would make a nice change from studs and beads.

The vinyls are all made from high quality vinyl and feel a bit thicker than NailVinyls (from @teismom). But they are very easy to work with and the thickness also refrain the decals from shriveling and melting - though very fine details do tend to melt over time.

I decided to try out the waves first since I'd had a particular idea involving brown polishes and some colour blocking that I've been toying with for a while. So here was an excellent excuse to get it done :D


I started with a base colour, OPI Over the Taupe. I topcoated it and then I let it dry completely.

I applied the wavy nail vinyl in the middle of every finger and painted with OPI You Don't Know Jacques on the right side of the vinyl and with OPI Suzy Says DA! on the left side - one finger at a time! I removed the vinyl immediately after I'd applied the polish in order to get crisp lines.


I let it dry for a couple of minutes and then put on a fast drying top-coat - et voilá: chocolate nails :D

One thing I noticed was that the vinyl was rather wide which did cause some slight problems when it came to my ridiculously small little finger nail ;) - it took some re-positioning in order to get a decent pattern. But I prevailed and it came out really well I think.

For my next mani I chose a combination of guides and decals. I decided to do a french tip mani, mostly because I hate using french tip guides since I really don't like my smile line too deep and it always is if I use regular french tip guides. What I noticed with these was they look slightly less curved than what I usually see, so my curiosity got tickled :D.


For this look I started out painting my nails with RBL Forgotten Road and topcoated it. Then I let it dry completely before using the french tip guide, doing one nail at a time.


I aligned the tip guide immediately below my smile line on my tip and then painted with a liberal layer of RBL Under the Stars to get good coverage.


I removed the tip guide at once I finished to ensure a crisp line. I then positioned the triangles and finished my mani with another layer of top coat.

These tips were a bit too wide for my small nails so the curve isn't as pronounced as some may like, but I really love the straighter look this gives me.

And now for the thing that really had me excited: Loki's Nail Aprons. Yes, I know it sounds crazy but this is really what these suckers are. Take a look at this:

Make sure you fit them so they slightly overlap - you can probably guess what'd happened in the middle when I removed them
See??? This will be awesome if you watermarble or do gradients. As a matter of fact that is what I used them for!! Gradients that is...

They are made of a diffent kind of vinyl than the rest and according to Tara there is circa 10 uses in an apron before the nail polish changes its stability.


As you can see there is very little clean up needed when you use these nail aprons - and if you are more careful with your positioning of these little suckers than me you can definitely get an even cleaner finger with almost no cleaning needed. Which is a total win in my book!!!

So if you can't get school glue to work for you as shielding or if you get vaseline mixed in your makeup sponge when you do gradients but still want to cover your fingers to reduce the amount of clean-up then I can definitely recommend using Nail Aprons.

All in all I think it is safe to say that these vinyls are a great acquaintance. I like that Tara has both guides and decals in her shop, it makes room for versatility in one's nail art. And hellooooo there are some awesome decals there: Pacman, angels, TARDIS, Loki's helmet...it really speaks to my nerdy side :D

You can buy Loki's Nail Vinyls in her shop here - and yes she does ship internationally ;). Make sure to follow her on Facebook for promotions and news.

If you make nail art using them remember to hashtag them #lokisnailvinyls so Tara and others can enjoy your art work.

These were sent to me for my unbiased consideration.

fredag den 28. november 2014

Fancy Friday #81: Lead Light Nails

I have been looking forward to this technique because it means that I get to use my awesome Rica Squish polishes again. Back when we did reverse stamping I used them for that and thought they would be excellent for lead lighting. Which they are :D

Rica Polish Lemon Squish

I followed Julia from Messy Mension's tutorial on Youtube which made this awfully simple.

Rica Polish Strawberry Squish

Basically you are colouring in your stamp with a dotting tool or a small nail art brush, using jelly or tint polishes like OPI Sheer Tints or the Squish polishes from Rica.

Rica Polish Tangerine Squish

My stamping wasn't really good so I made good with what I had ;)


Here is Julia's guide which will give you an excellent run-through of the technique:


I sure will be doing this again, got a whole lot of comments on my nails.

Remember to drop by the other girls, they have some wonderful leadlight nails to share with you.

Så blev det tid til at afprøve en teknik som bliver kaldt Leadlighting, en indfarvningsteknik man typisk bruger til stamping og som skal forestille samme type glasmaling som man bruger til blyindfattede ruder. Det er en nem måde at få neglene til at se avancerede ud - hvilket jeg elsker ;). Check Julia fra MessyMansion's video, find nogle tintlakker eller lav en lille portion selv ved at fortynde en kraftigt pigmenteret lak med en klar lak, indtil farven er gennemsigtig, og prøv selv Leadlighting.

mandag den 24. november 2014

The Giving Thanks Multi-Blogger Giveaway

Here's another Monday and the beginning of another week. And in order to make your week start off on a blast, I welcome you to the Giving Thanks Multi-Blogger Giveaway.

Some of the wonderful friends I've met through nail polish are both bloggers and makers - and we have decided to celebrate the most important people in our endeavours: You, our readers and customers!!! If it weren't for you we wouldn't be doing this. We love to share our thoughts and polishes with you and we are really lucky to have  such a wide range of wonderful people supporting us.

So without further ado, here is all you want to know about the prizes:


The giveaway closes on Sunday November 30th at midnight(EST)
There will be NINE winners:


Two polishes (winner's choice) from The Nail Junkie!


One product (winner's choice) from Wishful Bath & Beauty/Fever Lacquer!


One polish (winner's choice) from Superficially Colorful Lacquer!


Four polishes (winner's choice) from Alter Ego Nail Enamel!


One item (winner's choice) and a not-yet-released bath & beauty product from Paint Box Polish!


One heart necklace from the new thermal polish collection from BKD Signature!


Two polishes (winner's choice) from 6 Harts Polish!


Mystery Prize from Darling Diva Polish!


Now is that one awesome giveaway or what? Hurry up and fill in the Rafflecopter form for your chance to win!!


Giveaway is open internationally.

If fees are incurred for the PayPal prize, which is usually the case with international winners, the fees will be deducted from the prize amount.


a Rafflecopter giveaway

lørdag den 22. november 2014

Fancy Friday #80: Water Colour Nails

Fabulous challenge this week, another technique I haven't had time to explore yet, so it was nice finally to get on the band wagon :D.

It is really easy nail art, since it only requires some nail polish, a nail art brush and some acetone.


I used Rica Wipe Out as base colour and the following polishes for the watercolour spludges: Cult Nails Devious Nature, Tied Up, Feel Me Up and Vicious. And Essie Mojito Madness for the green touches.


I dotted some polish - one colour at a time - on the nail and the SOAKED the brush in acetone and just placed the brush in the middle of the dots and drew a little with it, continued to the next nail and repeated the process. When I'd finished the last nail, the first was dry enough to get to work with the next colour.


As you can see this mani is REALLY busy, but somehow I really like it!!


Remember to check out the other water colour manis from the rest of the Fancy Friday girls.

Water Colour negle er nok en teknik jeg endnu ikke har kastet mig ud i, men det var super sjovt og relativt nemt. Det ser en smule rodet ud, men jeg kan faktisk godt lide det her look.

Husk også at checke de andre Fælles Fredag piger og deres Water Colour negle.

søndag den 16. november 2014

52 Week Pick 'n' Mix Week #7: Yellow

This was going to be this huge yellow post, and then it turned out I accidentally deleted pictures that hadn't been saved :(.

So for this post it is going to be short and to the point.

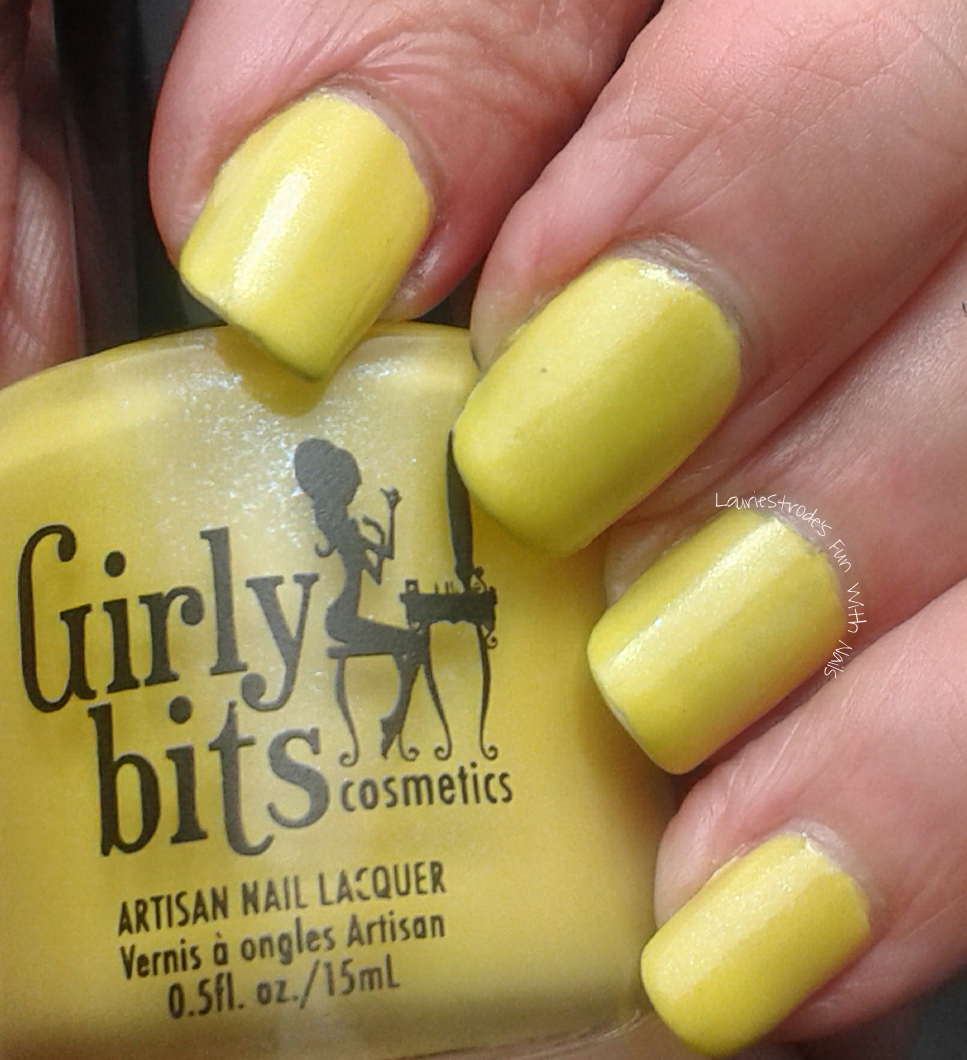
Yellow prompt with a Golden Oldie: Girly Bits Banana Hammock.


Short right?

See you next week ;)

Take a look at the wild animals and yellow manis the Nail Tarts have come up with this week.


52 Week Pick 'n' Mix Week #7: Wild Animals

I've been slacking on my 52 week challenge, but this week I have actually done both prompt in two different manis. Prompt one is Wild Animals and the Golden Oldie prompt is Yellow.

So first up is Wild Animals.


I instantly knew I was going to try out the cute animals tutorial that Jacki from Adventures in Acetone did a long time ago, they are so darn cute. In particular the monkey. What I didn't do was follow it :D - I was watching The Flash together with hubby while trying to do the monkey design - and we watched it on the computer and my phone was down so I did them from memory.


As you can see I got the proportions warped a bit, the upper face is a little too wide so the lower face is almost the same width. Not that it isn't cute to look at, but it looks more like a teddy bear than a monkey :D


I used Illamasqua Nurture as base, YSL La Laque no 36 Rich Coffee and Zoya Pasha for the monkey.


I loved doing these even though they weren't quite successful - and I will definitely follow Jacki's animal tutorials again :).

Take a look at the wild animals and yellow manis the Nail Tarts have come up with this week.

lørdag den 15. november 2014

Fancy Friday #79 : Favourite Nail Polish or Design

This week's challenge is a bit of both. As you well know I am a devout Elevation Polish believer. And though Lulu creates oodles of gorgeous polishes there is one that has always been my favourite. It is the one I choose when I need a pick-me-up or feel all my lovely pastels are a bit boring. Not so with this beauty.

I give you: Elevation Polish Toubkal, my all-time favourite nail polish!


It hits all the right buttons with me. It is a totally vampy colour (my first nail polish colour crush was on all things vampy) and it has glass flecks in abundance - a finish I've been crazy about since back when I bought Illamasqua Raindrops at it's initial release.


For good measure I've thrown in a favourite design and a go-to mani:

Stamping and Skittlette.

Usually I use as many different polishes for the skittlette as possible but with this one I really just wanted to show you that one. So in order to make it a skittlette I found some rhinestones in my  nail art travel case and put them on my thumb and ring finger. They only sat for a couple of hours since I only attached them with top coat :D


I love stamping and try to incorporate it in as many designs as possible. For this challenge I chose my Messy Mansion plate MM44 - with an absolutely gorgeous lace design. I received my new stamper heads from Messy Mansion - I finally got hold of the soft ones, and let me tell you, they stamp marvellously!!! I don't think I've ever had a this clean and crisp design!


I think it is gorgeous!!


Don't forget to take a look at the other favourite designs og nail polishes from my fellow Fancy Friday challengers.

Så er der dømt yndlingslak. Jeg er jo helt vild med Elevation lakker og elsker det meste af det Lulu laver. Især denne skønhed, Toubkal,  får mig til at tabe vejret når solen lyser over den. :D Jeg har så lige stemplet lidt henover den og pimpet den med et par rhinsten ;)

lørdag den 8. november 2014

Fancy Friday: Fan Brush/Sugar Spun

This challenge had me in frustrated ramblings within five minutes, haha. See I have done a fair amount of fan brush nail art so naturally I decided on sugar spun as my challenge. And boy did I regret that several times while I made these.

So welcome to nail fail city.


I used Elevation Polish Atop the Ferris Wheel as base colour and thought that since this was inspired by the fairground I'd choose colours that would fit as cotton candy, which really is spun sugar. So I decided to use Dior Porcelaine, Elevation Polish Mount Ventoux, Illamasqua Nomad and nails inc. oxford circus.


And colour wise I think this works great but Damn this was a hot mess. I definitely didn't have patience enough when I did it because I couldn't wait until the polish was dry enough.


Which resulted in all those huge ugly blobs you can see.


And the fact that I chose to do my very first sugar spun with four colours probably didn't help me much either.


I was at my wits end and decided never to do this again. BUT I have come to the conclusion that I need to try this at least one more time to see if I can't get it to work for me. Mostly because I've seen them done looking totally awesome.


Remember to check out what the rest of the wonderful Fancy Friday girls have come up with.

Nå, velkommen til denne uges nail fail. Jeg har valgt sugar spun som min udfordring for det har jeg aldrig prøvet før, mens jeg har lavet rigtig mange fan brush manier. Det var så ikke det bedste valg for mig, er du gal hvor jeg bandede hele vejen igennem. Det har jeg godt nok ikke tålmodighed til - og så gjorde det ikke sagen lettere at jeg havde valgt fire forskellige farver. :D